File manager
This document contains information about the built-in DirectAdmin file manager. File manager allows you to fully interact with the file system of the server. You can navigate through folders, copy files, move files, rename files, delete files, change file permissions, create new folders, create new files, and upload files via a web browser.
Access to the file manager
To access the File Manager, log in to the Control Panel and then click the System and Files icon and then the File Manager link.


Navigation
You can navigate through folders by clicking on the folder name or the folder icon (to the left of the folder name). For example, clicking the “domains” link (or the folder icon) will take you to a screen that looks like this:
You can always return to the previous directory by going to the “Folders” menu on the left side of the screen. The root directory will always return you to the maximum possible directory.
Copying files
The file manager allows you to easily copy files between folders. The first step is to go to the source directory. That is, go to the directory from which you want to copy the files. In this example we are in public_html and we want to copy the license.txt into the public_ftp directory.
Second, click the “+” symbol in the right corner of the screen and click the “Add to Clipboard” link. You can also check the box to the left of the file name and click the “Add to Clipboard” button at the top of the file list.

 Then open the folder where you want to paste the file (in our case “public_ftp”), go to the “View clipboard” button and select the desired clipboard action. (in our case “Copy files”).
Note: You can click the “View Clipboard” button to see the full path to the file you are working on. There you can delete user files from the clipboard.
Moving files
To move files, use the same procedure as for copying files, except that you click “Move Files” instead of “Copy Files.
Renaming files/folders
Next to each file/folder name on the left is an options menu. Press “+” to choose to rename the file in front of the file itself.
Then enter the new name of the desired file and press “Enter” or the green box to accept the new file.
Deleting files/folders
The steps for deleting a directory (folder) are the same as those for deleting a file. Note that deleting a directory also deletes everything inside it.
First, check the box next to the file or folders you want to delete. Then click the “Delete” button in the upper left corner of the table. A pop-up window appears asking “Do you really want to delete the selected files?” Click “Delete”.
You can also delete files by clicking the “+” symbol to the right of the table and clicking the “Delete” link.
Changing file access rights
The current permission level is listed in the table under “Dost”. column (the second column from the file/folder name). To change the permission level of a file or folder:
1. Press “+”, select “Set Permissions”.
You will be able to change them after you are done, press the green check button.
3. Check the box next to the file(s) or folders you want to change. Click the “Set Permissions” button. You will be offered a detailed selection of the desired permissions. Change the access rights and click the “Install” button.
Some common levels of permissions:
Files
600 Makes the file inaccessible
644 Readable to all (e.g., HTML documents)
666 File can be read and changed (e.g. files changed by scripts)
755 File can be read and executed by any user (e.g. for scripts)
777 Written and performed by all (not recommended)
Catalogs
711 Files in the directory can read everything, but not the contents
755 Files and directory contents can be seen by all
777 Allows full read/write/delete access to the directory (not recommended)
Most scripts must be set to 755. Please refer to the script documentation for proper installation instructions.
To learn more about file permissions, click here.
Creating new files/folders
It is very easy to create a new folder. First navigate to the directory in which you want to place the new folder. For example, if you want to create https://www.example.com/news/, go to the public_html directory of the example.com folder.
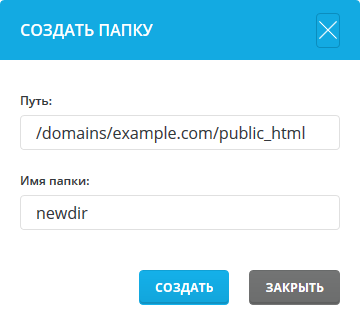
Next, click the “New Folder” button at the top of the list of folders and files. You will see your current path. You can change it manually if you want to save the file in a different location. Enter a name for the folder and click “Create”.
Note: you can create files in the same way, just click “Create File” instead of “New Folder”.
Editing files
Some files can be edited in the file manager. To view the file, click on the file name. You can only view text files. If you click on other files, they will be downloaded to your computer.
To edit a file, click the “Edit File” button located in the menu that opens opposite the object (“+”). To save the edited changes, click the “Save” button.
Downloading files
 1.Click the “Upload File” button at the top of the page.
2.Make sure you are in the right directory.
3.Drag and drop the desired files into the field.
4.Click the “Download” button.


