To begin with, in our opinion, LiteSpeed Cache is one of the best caching plugins for Wordpress. It has only one disadvantage – you can use all its features only on servers with a Litespeed web server. Our hosting plans for Wordpress use just such a web server.
A few facts about the LiteSpeed web server
- It is the 4th most popular web server in the world, although in terms of performance it is one of the best. The advantage of it is full compatibility with Apache, so when you switch to a web server, you do not have to change anything in your sites.
- Even without additional settings, Litespeed gives good speed
- He has caching plugins for WordPress, Joomla, Drupal, Magento and many other systems.
A few words about the LiteSpeed caching plugin
- It is free, and in terms of capabilities and acceleration is not inferior to paid caching plugins.
- Regularly updated, the developers are constantly working on its improvement.
- Great for both small sites and large projects with millions of visitors.
LiteSpeed Cache plugin features
- Server caching
- Object caching
- Can cache pages for authorized users and for admins
- Optimizing Images
- CDN compliant
- Database optimization
Quick setup option
If you don’t have a lot of time to go through all the plugin options, here’s a quick setup option that you can literally do in a few minutes.
- Install the LiteSpeed WordPress Cache Plugin and go to its settings.
- General > General Settings > Domain Key. Request a domain key only if you plan to use QUIC.cloud. This only applies to servers without a Litespeed webserver.
- General > General Settings > Guest Mode – OFF.
- Cache > Cache > Enable Cache – ON. For servers without a Litespeed server – use QUIC.cloud.
- Cache > Cache > Cache authorized users – OFF.
- Cache > Cache >Remove query string. There should be four entries, each on a new line: fbclid, gclid, utm*, _ga
- Cache > Clear > Use expired resources – OFF.
- Cache > Browser > Browser Cache – ON.
- Cache > WooCommerce > Cart Caching – OFF.
- CDN > CDN Settings > QUIC.cloud CDN – enable it if you want to use QUIC.cloud CDN
- CDN > CDN Settings > CloudFlare API – only for Cloudflare users – enter the API key, email and domain.
- Page Optimization > CSS Settings > Built-in Asynchronous CSS Library – OFF.
- Optimize Pages > HTML Settings > Remove WordPress Emoji – ON. All modern browsers have built-in emoji support.
Quick import of settings
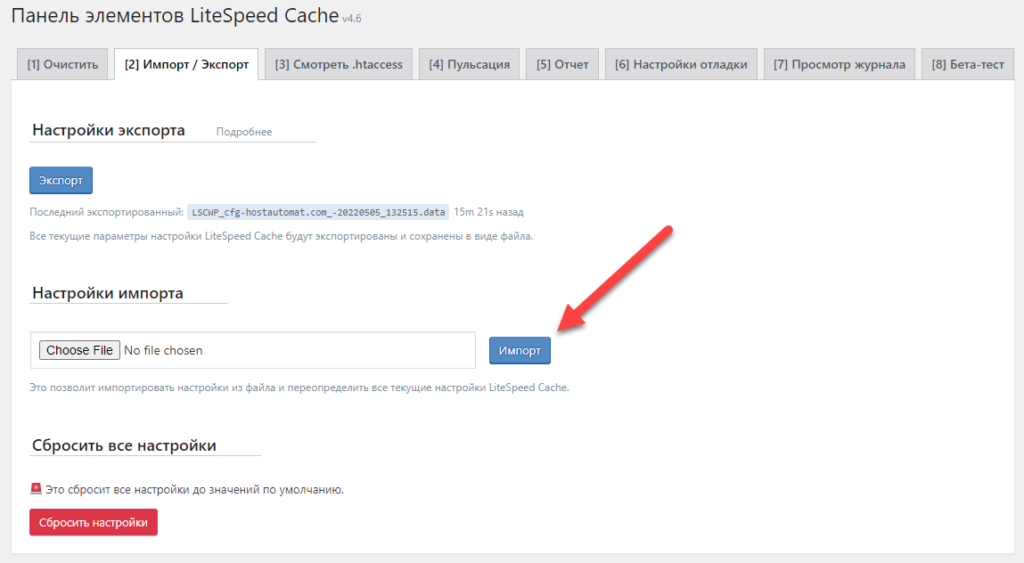
To save time, we made a settings file that you can import into LiteSpeed Cache.

You can import settings under Item Panel > Import / Export.

